An ankle that wobbles is rarely a problem with the bones themselves. In most cases, the muscles and nerves around the joint are reacting a fraction too late to catch a roll, often after an old sprain that never fully settled. The three drills in this guide — a single-leg balance hold, a heel raise with a slow lower, and a controlled side-step — train exactly that: the small, fast corrections that keep you upright. They need nothing more than a wall or a sturdy counter and take about ten minutes in total. Below you will find how to perform each drill correctly, how to progress safely, how often to practise, when to stop, and how persistent ankle instability can sometimes connect to bone-softening conditions such as osteomalacia.
Why Ankles Wobble in the First Place
A wobbling ankle is often described as “giving way.” The foot may roll inward or outward unexpectedly, especially on uneven ground, stairs, or during a quick turn. In most cases the cause is a combination of loose ligaments after an old sprain and muscles that respond a fraction too late to correct the movement.
Proprioception — your body’s sense of where a joint sits in space — also plays a part. After an injury or a long period of reduced activity, this sense can become less sharp, so the ankle does not “report back” quickly enough. Balance drills retrain that feedback loop, which is why they work even when the ligaments themselves cannot be tightened.
There is another group of causes worth knowing about. If your ankles feel weak alongside bone pain, muscle aches, or a general feeling of heaviness, the problem may not be the ankle joint alone. Osteomalacia, a condition in which bones soften because of poor mineralisation, can cause bone pain and muscle weakness that make standing and walking feel unsteady. That is a medical issue, not a training one, and it needs a doctor’s assessment.
- Previous ankle sprains that did not receive full rehabilitation
- Weak calf and foot muscles from low activity
- Reduced balance and position sense after injury or illness
- Loose ligaments that no longer hold the joint firmly
- Bone or muscle problems linked to a health condition such as osteomalacia
Before You Start: A Quick Safety Check
These drills are for general strengthening and balance. They are not a treatment for a diagnosed condition, and they should not be used to push through pain. If you have had a recent sprain, a fracture, or surgery, ask a physiotherapist or doctor before starting.
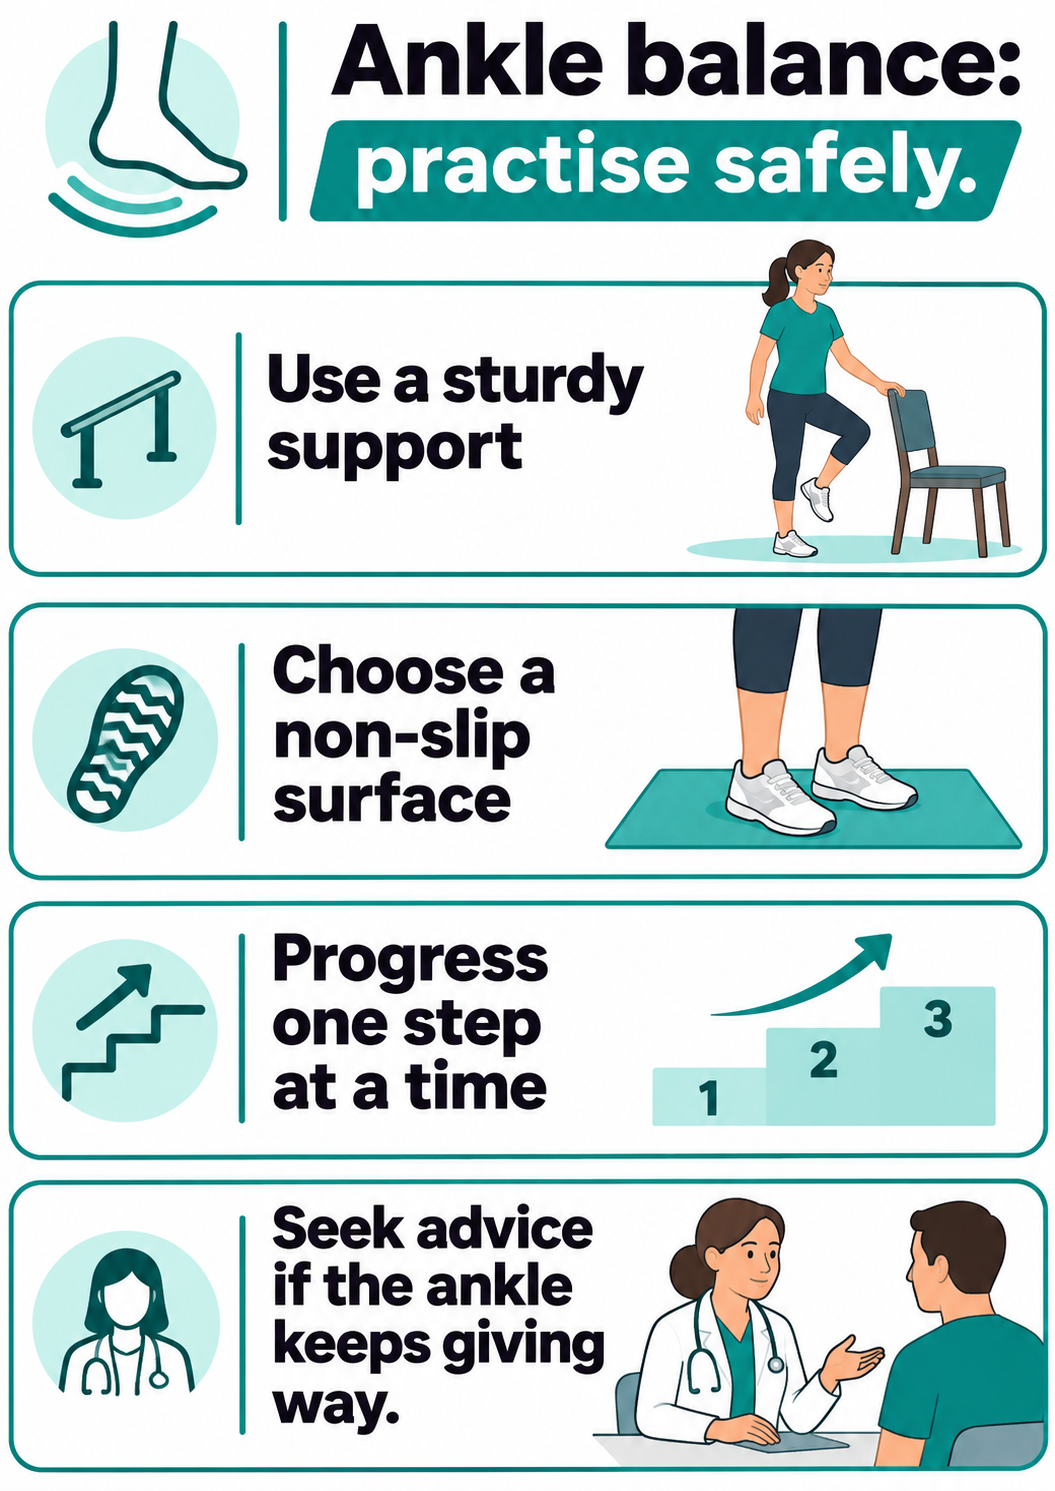
Set yourself up so a wobble is safe. Stand near a wall or a sturdy counter so you can rest a fingertip on it if needed. Wear flat, supportive shoes or go barefoot on a non-slip floor — not socks on tiles.
Stop and seek medical advice if you notice any of the following:
- Sharp pain inside the joint during or after a drill
- Swelling that appears or increases after exercise
- The ankle giving way completely, or a feeling that it cannot bear weight
- Numbness, tingling, or weakness that spreads beyond the ankle
- Bone pain that is worse at night or tender to touch
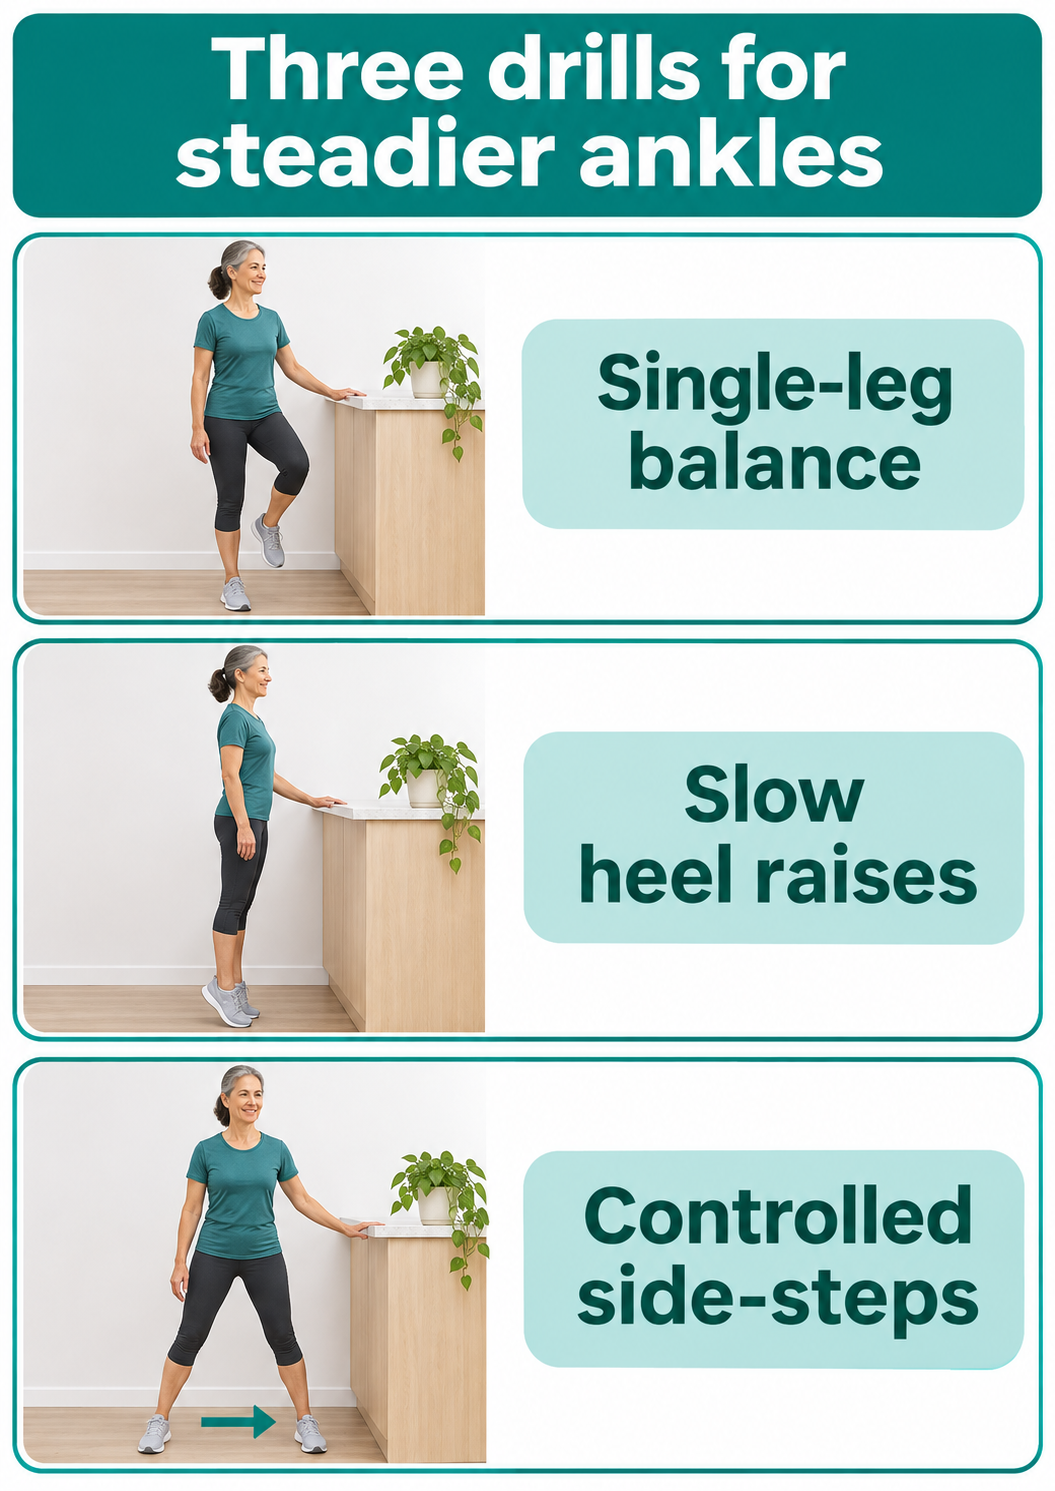
Drill 1: The Single-Leg Balance Hold
This is the most direct way to train the small corrections that stop a wobble. Stand on one leg and let the ankle do the work of keeping you upright. The aim is not to stand perfectly still — small, controlled sway is exactly what you are training.
How to Do It
- Stand tall with feet hip-width apart, near a wall or counter.
- Shift your weight onto one foot and lift the other foot slightly off the floor.
- Hold for 20 to 30 seconds, keeping your hips level and your knee soft, not locked.
- Step down, rest for 20 seconds, and repeat on the other leg.
- Complete three rounds on each side.
Making It Harder or Easier
If you feel unsteady, rest one fingertip on the counter — that small contact is enough to build confidence while still challenging the ankle. As it gets easier, progress in stages rather than jumping ahead.
- Start with eyes open and a fingertip on a support
- Move to eyes open with no support
- Then try eyes closed, only with a support within reach
- Finally, add a slow head turn left and right while balancing
A common mistake is gripping with the toes to stay up. Let the toes relax and let the ankle and calf do the correcting. If you can hold 30 seconds comfortably with eyes closed, that ankle is responding well.
Drill 2: The Heel Raise With a Slow Lower
Strong calf muscles act as both a spring and a brake for the ankle. Most people can rise onto their toes; fewer can lower themselves slowly and under control. The slow lowering phase is where much of the strengthening happens, so give it twice as much time as the rise.
How to Do It
- Stand with feet hip-width apart, fingertips lightly on a counter for balance.
- Rise onto the balls of both feet over about two seconds.
- Pause briefly at the top.
- Lower your heels slowly over three to four seconds until they touch the floor.
- Do 10 to 15 repetitions, rest, and repeat for three sets.
Progressions That Keep It Useful
Once double-leg raises feel easy, shift more weight onto one leg. You do not need to lift the other foot fully — just take most of your weight through the working leg. Later, you can raise the heel of the working leg only, keeping a fingertip on the counter.
- Both legs, slow lower — starting point
- Most weight on one leg, other foot lightly touching down
- Single-leg heel raise with fingertip support
- Single-leg heel raise with a three-second pause at the top
Keep the movement straight up and down. If the ankle rolls outward or the heel drifts to one side, reduce the load and slow down further.
Drill 3: The Controlled Side-Step
Balance and strength are useful, but ankles also need to handle sideways movement, which is where many wobbles happen. This drill teaches the ankle to control side-to-side motion at a walking pace.
How to Do It
- Stand with feet together, knees slightly bent.
- Step sideways with one foot, landing softly on the whole foot.
- Bring the other foot to meet it, without crossing the legs.
- Take five steps in one direction, then five back.
- Repeat for three sets, keeping the pace slow and deliberate.
If you have a resistance band, loop it around both ankles to add sideways tension. Without a band, simply slow the movement down and pause for one second each time your foot lands.
What Good Form Looks Like
- Knees stay soft and point in the same direction as the toes
- Feet land quietly, not with a thud
- Hips stay level — no leaning or hiking one hip up
- The ankle stays centred rather than rolling in or out
How Often to Practise and How to Progress
Consistency matters more than duration. Three to four short sessions a week is a reasonable starting point, and each session should take around ten minutes. Doing the drills daily is generally fine if the ankle is not sore afterwards.
Use the table below as a simple weekly plan. Adjust the numbers to your own comfort, and drop back a level if you feel pain or the ankle feels less stable than before.
| Drill | Repetitions or Hold | Sets | Suggested Frequency | Main Benefit |
|---|---|---|---|---|
| Single-leg balance hold | 20–30 seconds per leg | 3 per leg | 3–4 times a week | Balance and quick ankle corrections |
| Heel raise with slow lower | 10–15 repetitions | 3 | 3 times a week | Calf strength and control |
| Controlled side-step | 5 steps each direction | 3 | 2–3 times a week | Sideways stability |
Progress one variable at a time — either more repetitions, a longer hold, or less hand support. Changing everything at once makes it hard to tell what is working.
Everyday Habits That Protect a Wobbly Ankle
What you do outside the drills matters too. Supportive footwear with a firm heel counter helps, especially on uneven ground. Avoid walking on icy or gravel surfaces in thin-soled shoes if your ankle has been giving way.
When you feel a wobble coming, resist the urge to stiffen the whole leg. Let the ankle make the small correction and keep your weight centred over the foot. This is the same skill you practise in the balance hold.
- Choose shoes with good grip and a supportive heel
- Warm up with 30 seconds of gentle marching before drills
- Avoid sudden increases in walking or running distance
- Use a handrail on stairs if balance feels uncertain
- Keep the drills going even after the ankle feels better
When Ankle Weakness Points to Something Else
Sometimes ankle instability is part of a wider picture. Osteomalacia causes bones to soften because of a mineralisation problem, and it can lead to bone pain, muscle weakness, and a general sense of unsteadiness. People with this condition may find that balance work alone does not solve the problem.
Signs that deserve a medical review include bone pain in the hips, ribs, or legs, muscle aches that are worse with activity, and weakness that makes standing up from a chair difficult. These symptoms are not proof of osteomalacia, but they are reasons to see a doctor rather than to keep training through them.
Diagnosis is made by a clinician, usually with blood tests and sometimes imaging. Reliable background information is available from the NHS overview of osteomalacia and from the NIAMS health topic page on osteomalacia. If you are diagnosed, follow your doctor’s treatment plan; balance drills may still help, but only once your clinician agrees they are safe.
Common Mistakes That Slow Progress
Most people who do not improve are making one of a few predictable errors. Fixing these usually matters more than adding new exercises.
- Holding the breath or bracing hard during balance work
- Rushing the lowering phase of heel raises
- Using so much hand support that the ankle is never challenged
- Skipping the weaker leg because it feels frustrating
- Stopping the drills as soon as the wobble reduces
- Ignoring pain and swelling in the hope they settle
A simple rule: if a drill feels like a controlled challenge, it is working. If it feels like a struggle to stay upright, make it easier.
Conclusion
Wobbling ankles usually respond well to three simple drills: the single-leg balance hold, the heel raise with a slow lower, and the controlled side-step. Practise them a few times a week, progress gradually, and use a wall or counter whenever you need it. If weakness comes with bone pain, muscle aches, or a feeling that something else is wrong, get medical advice — conditions such as osteomalacia need proper assessment before any exercise plan.
Frequently Asked Questions
How long does it take to see improvement in a wobbly ankle?
Many people notice steadier balance within a few weeks of regular practice, but full improvement in strength and control usually takes longer. Progress depends on your starting point, whether there was a previous injury, and how consistently you train. Judge progress by control and confidence rather than a fixed timeline.
Can I do these drills if I have had an ankle sprain before?
Yes, once the acute swelling and pain have settled and a clinician has cleared you for exercise. If the sprain was recent or severe, start with fingertip support and shorter holds. If the ankle swells or hurts afterwards, reduce the load and seek advice.
Should I wear shoes or go barefoot for balance drills?
Both have a place. Barefoot work on a non-slip floor gives your foot more feedback, which helps balance training. Supportive shoes are useful if you are practising on harder surfaces or if your ankle feels vulnerable. Avoid socks on smooth floors.
Why does my ankle wobble more when I close my eyes?
Closing your eyes removes visual information, so your body relies more on signals from the ankle joint and muscles. A bigger wobble with eyes closed simply shows that those signals need more training. Build up gradually and keep a support within reach.
Is a wobbling ankle a sign of osteomalacia?
Not on its own. Most ankle instability comes from ligament looseness or muscle weakness after injury. Osteomalacia can cause muscle weakness and bone pain that affect steadiness, but it is diagnosed by a doctor using tests. Bone pain, muscle aches, and general weakness alongside ankle problems are reasons to seek medical advice.
How do I know if I am progressing too fast?
Warning signs include soreness that lasts more than a day, new swelling, or the ankle feeling less stable during normal walking. If any of these appear, drop back to an easier version for a week. Steady, gradual increases work better than sudden jumps.
Can I do these drills every day?
Daily practice is usually fine if the drills feel comfortable and there is no pain or swelling. Many people do balance work most days and strength work three times a week. Listen to your body and take a rest day if the ankle feels tired or sore.
Do ankle supports or braces help with wobbling?
Braces can provide extra support during sport or on uneven ground, but they are not a substitute for strengthening. Using a brace constantly may reduce the ankle’s own training opportunities. Ask a physiotherapist whether a brace suits your situation.
What should I do if the ankle gives way completely during a drill?
Stop the drill, sit down, and check for pain, swelling, and whether you can bear weight. If the ankle is painful, swollen, or cannot take your weight, seek medical assessment. If it settles quickly, restart at an easier level with hand support.
Are these drills suitable for older adults?
Yes, with sensible adjustments. Use a sturdy counter or wall for support, keep holds short, and avoid eyes-closed work until balance is confident. Older adults with bone pain, muscle weakness, or a history of falls should speak to a doctor or physiotherapist before starting.